 ultimate-guide
How to Make Voiceovers Sound Professional: 2026 Guide
Table of Contents
- Voiceover Recording Tips: Gear and Setup That Prevent Problems
- How to Reduce Room Echo in Recordings Before You Hit Record
- How to Edit Voiceover Audio: A Step-by-Step Workflow
- Audio Post-Processing for Speech: EQ, Compression, and De-Essing
- Vocal Health and Delivery: What Makes Professional Voiceovers Sound Effortless
- AI-Assisted Post-Production and Budget Workflows for Professional Voiceovers
- Frequently Asked Questions
Last Updated: September 15, 2026
Voiceover Recording Tips: Gear and Setup That Prevent Problems
Most voiceover problems are created before you press record, so knowing how to make voiceovers sound professional starts earlier than you think. Learning how to make voiceovers sound professional starts with the signal chain, not the software, and the fastest fix is stopping bad audio at the source. This guide covers microphone choice, room treatment, editing, and post-processing.
Signal-to-noise ratio is the relationship between your voice and the background noise. A high ratio means your voice sits well above the noise floor; a low ratio means every later edit amplifies the problems too.
Microphone Choice, Polar Patterns, and Placement
A condenser microphone captures detail and high-frequency nuance, suiting treated, quiet rooms. A dynamic microphone rejects more of the room and handles louder, untreated spaces better.
Polar patterns describe how a mic hears sound from different directions. The cardioid pattern picks up mostly what's in front and rejects what's behind, the default for solo voice work.
Placement matters as much as the mic. Keep the capsule 15 to 20 centimeters from your mouth and slightly off-axis to reduce plosives, the bursts of air on "p" and "b" sounds.
Gain Staging, Phantom Power, and Your Audio Interface
Gain staging sets levels so the signal stays clean at every stage. Aim for peaks around -12 dBFS to -6 dBFS, leaving headroom for loud moments and preventing clipping.
If your mic needs phantom power, the audio interface supplies it, usually labeled +48V. Set sample rate to 48 kHz and bit depth to 24-bit for spoken word, enough dynamic range without huge files.
Latency, the delay between speaking and hearing yourself, is why monitoring feels distracting. Direct monitoring on the interface sidesteps it.
How to Reduce Room Echo in Recordings Before You Hit Record
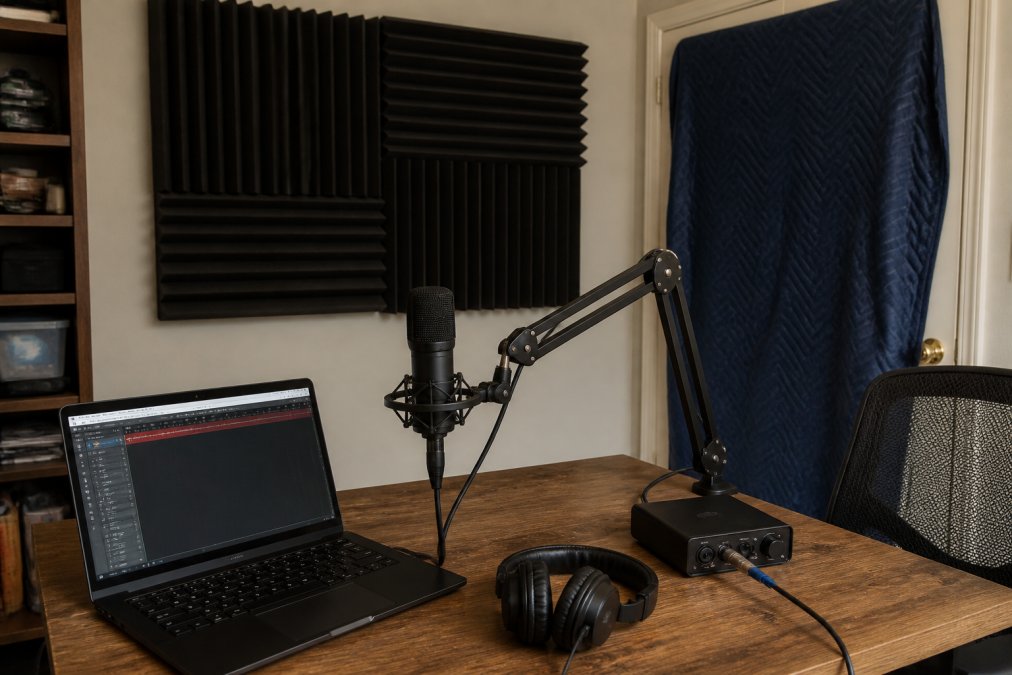
You cannot fully fix a bad room in post-production. Acoustic treatment is the practical answer: soft materials absorb room reflections before they reach the mic. But "hang a blanket" is not a plan, start by understanding what the room does to your voice.
Diagnose the Room Before You Buy Anything
Clap once, sharply, from your recording position. Then listen.
- A quick, tight slap that dies in under a quarter second means the room is already usable. Move on to mic placement.
- A short ring or flutter means you have parallel hard surfaces bouncing sound back and forth. That is the boxy tone you hear on playback.
- A long tail or a metallic zing means the room is too live for voice work and needs real absorption, not a token blanket.
A more precise method: record ten seconds of room tone, then yourself speaking normally, and play both back on headphones. If your voice sounds like it is coming from inside a shoebox, the room is coloring the signal before the mic captures it.
How Reflections Actually Reach the Microphone
Sound leaves your mouth in every direction. The mic hears your direct voice plus every reflection that bounces off a surface and lands at the capsule within milliseconds. Those early reflections smear intelligibility and create a hollow, distant quality no EQ can remove.
The reflections that matter most are the first-reflection points: the surfaces where sound from your mouth bounces once and arrives at the mic almost as loudly as your direct voice. For a typical seated setup, those are:
- The wall directly behind the microphone
- The wall directly behind your head
- The ceiling above the mic
- The desk or table surface in front of you
- The side walls at roughly ear height
Treat those five zones first. A single thick absorber behind the mic does more than foam scattered randomly across a whole wall.
Prioritize Treatment by Reflection Point, Not by Coverage
Absorption converts sound energy to heat inside a porous material. Thickness matters more than surface area for low frequencies: a thin foam tile does almost nothing for a boomy voice, while a 2-inch mineral wool panel does. Priority order for a home setup:
- Behind the microphone. A thick moving blanket, a packed bookshelf, or a commercial absorber panel. This is the single highest-value move.
- Behind your head. A curtain, a tapestry, or another blanket. This kills the reflection that arrives from behind you and folds back into the mic.
- The desk surface. A desk mat, a folded towel, or any soft material on the hard surface in front of you.
- The ceiling. A cloud panel or a hanging fabric if the room is tall and reflective.
- Side walls. Last priority for a cardioid mic, because the pattern already rejects much of what comes from the sides.
A thick moving blanket over a closet door, a rug on a hard floor, and unevenly packed bookshelves all break up reflections; curtains beat bare walls.
Acoustic Treatment vs. Soundproofing: What Actually Helps
How to Edit Voiceover Audio: A Step-by-Step Workflow
Audio Post-Processing for Speech: EQ, Compression, and De-Essing
EQ and High-Pass Filter Settings for Voice
Compression, Limiting, and Peak Normalization
| Stage | Setting to Start With | What It Fixes |
|---|---|---|
| High-pass filter | 80-100 Hz | Rumble, handling noise |
| Mud cut | 200-400 Hz, -2 to -4 dB | Boxy, congested tone |
| Compression | 3:1 ratio, 3-6 dB reduction | Uneven volume |
| Limiter | Ceiling near 0 dBFS | Peaks and clipping |
| De-esser | 5-8 kHz, targeted | Harsh sibilance |
Vocal Health and Delivery: What Makes Professional Voiceovers Sound Effortless
Delivery technique matters as much as the voice itself:
AI-Assisted Post-Production and Budget Workflows for Professional Voiceovers
What AI Post-Production Actually Does to Your Signal
The Three-Tier Workflow, With Real Constraints
When to Use AI Processing and When to Do It Manually
Use AI-assisted processing when:
Do it manually when:
Privacy and File Handling
Frequently Asked Questions
How can I make my voice sound more professional without expensive gear?
Start with the room. Soft furnishings, a rug, and bookshelves break up room reflections that cause echo. Place your microphone 15-20 cm from your mouth and slightly off-axis to reduce plosives. Use a free pop filter or a sock over the mic. Record at a moderate level and apply a high-pass filter around 80-100 Hz to cut rumble. These steps alone can make a budget USB mic sound broadcast-ready.
What is the best microphone technique for professional voiceovers?
Use a cardioid condenser or dynamic microphone positioned 15-25 cm from your mouth, angled 15-30 degrees off-axis. This reduces plosives and sibilance while keeping mid-range clarity. Speak across the mic, not directly into it. Maintain a consistent distance to avoid level swings. If you move, adjust the mic stand, not your head. This technique also minimizes the proximity effect, which can make your voice sound boomy and uneven.
How do I remove background noise from voice recordings?
First, fix the source. Turn off HVAC, fans, and appliances. Record in a treated room or a closet with soft materials. If noise remains, use a noise reduction tool with a low threshold. For speech, a de-noiser set to 6-10 dB reduction usually cleans up without artifacts. Always record a few seconds of room tone to help the software learn the noise profile.
What is the role of audio post-processing in professional voiceovers?
Post-processing fixes what recording cannot. A high-pass filter removes low rumble. EQ boosts mid-range clarity around 2-5 kHz. Compression evens out volume swings so quiet and loud passages sit together. A de-esser tames sibilance. A limiter catches peaks and prevents clipping. Finally, peak normalization brings the track to a consistent loudness target. This chain turns a raw take into a polished, broadcast-ready voiceover.
How do I edit voiceover audio for a fast-paced delivery?
Use a silence shortener or manual trim to cut dead air between sentences. For a fast-paced social media video, set pauses to 0.2-0.3 seconds. For audiobooks, keep 0.5-0.7 seconds for natural rhythm. Remove breaths that are louder than the speech, but leave some for realism. Apply a high-pass filter and a de-esser before compression. Then use a limiter to catch peaks.
What software is best for editing professional voiceovers?
The best software depends on your workflow. Full DAWs like Reaper or Audacity give you complete control but have a learning curve. For creators who want speed, Finalizer processes audio and video locally in your browser. It requires no account for the free tier and keeps your files private. If you need advanced multitrack editing, use a DAW; for fast, broadcast-ready speech, use a dedicated speech processor.
Can AI tools replace a professional audio engineer for voiceovers?
AI tools handle baseline tasks like noise reduction, EQ, compression, and de-essing quickly and consistently. They are ideal for podcasters, course creators, and social media videos. However, complex projects with multiple speakers, music beds, or creative sound design still benefit from an engineer's ear. For most spoken-word content, AI post-processing gets you 90% of the way there in a fraction of the time. Use it as a first pass, then refine if needed.