 how-to
Remove Background Noise from Voice Recordings Online
Table of Contents
- Why You Need to Remove Background Noise from Voice Recordings
- Step-by-Step Guide to Remove Background Noise from Voice Recordings Online
- How to Improve Voice Recording Quality Before You Start
- AI Audio Enhancer Online: What It Can and Can't Fix
- How to Remove Background Noise from Video Online
- Tips for Better Voice Recording Quality
- Frequently Asked Questions
Last Updated: September 13, 2026
Why You Need to Remove Background Noise from Voice Recordings
Clean audio is not a nice-to-have. When listeners hit a hiss, a hum, or a room echo in the first thirty seconds, many simply stop listening. This guide from Finalizer explains how to remove background noise from voice recordings online, using browser-based tools that need no installation or audio engineering degree.
Spoken-word content has exploded, podcasts, audiobooks, course modules, TikTok voiceovers, corporate training videos, and listeners now judge production quality instinctively, in seconds.
Here's the part most creators learn the hard way: you cannot fix a bad recording in editing, only improve it. Every artifact captured at the microphone is baked into the file.
Common Types of Background Noise
Background noise is any unwanted sound captured alongside the voice, and knowing which variety you're fighting tells you what processing will help.
- AC hum: a steady low-frequency drone from electrical systems, often around 50 or 60 Hz
- Fan hiss: broadband high-frequency noise from computer fans, air conditioning, or ventilation
- Mic rumble: low-end vibration transmitted through desks, floors, or handling
- Vocal plosives: hard "p" and "b" bursts that overload the microphone capsule
- Static: intermittent crackle from cheap interfaces, cables, or wireless interference
- Wind noise: turbulent air hitting the mic diaphragm, common in outdoor interviews
- Room echo: reflections off bare walls, which blur speech and reduce intelligibility
Each type responds to different processing: a high-pass filter removes rumble and hum, de-essing targets sibilance, de-rooming reduces reflections. Treating all noise as one problem produces a muddy result.
Benefits of AI-Powered Noise Reduction
AI noise reduction uses trained models to separate voice from everything else in the frequency spectrum rather than applying a fixed filter, suppressing noise while leaving consonants and breath intact.
Traditional noise gates and EQ curves are blunt instruments: they either leave the hiss or make the speaker sound like they're calling from a submarine. Machine learning models trained on speech learn what a human voice looks like in the signal and preserve it.
The gains show up in clarity, consistency, and time: voice isolation removes competing frequencies, the same processing applies across a session, and one click replaces twenty minutes of manual DAW automation.
Step-by-Step Guide to Remove Background Noise from Voice Recordings Online
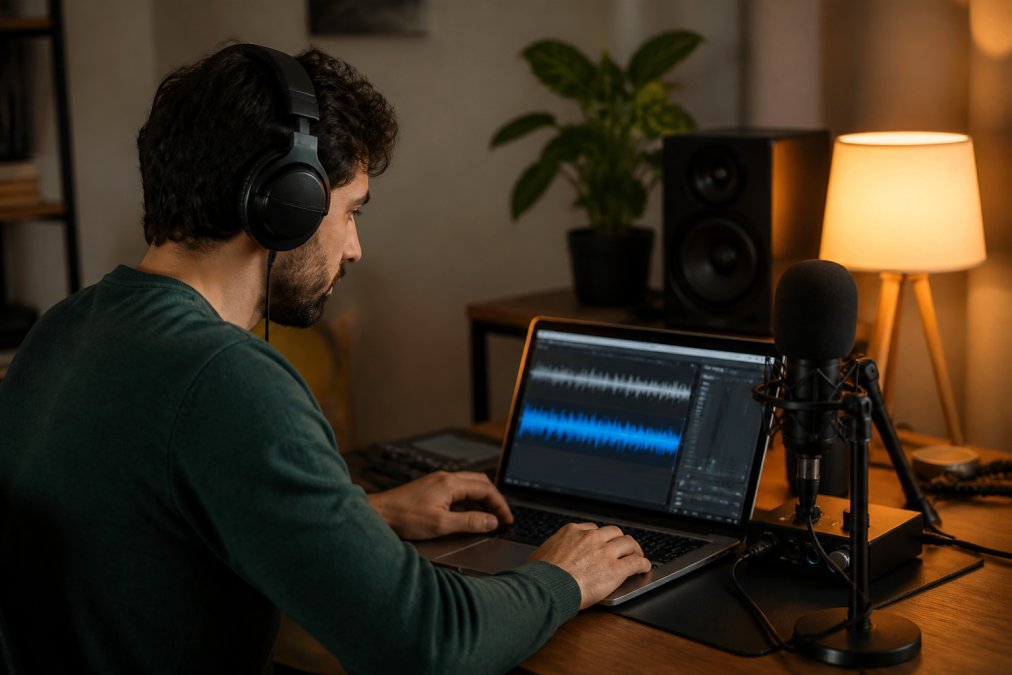
Browser-based processing has closed most of the gap with desktop software: you can clean a file in three steps without installing anything, and the results hold up for podcasts, e-learning modules, and social video.
What You'll Need
- Your original audio or video file in a common format: WAV, MP3, AAC, or MP4
- A stable browser on desktop or laptop with CPU headroom
- Headphones, to hear artifacts laptop speakers hide
- A quiet moment to compare before and after
Step 1: Upload Your Audio or Video File
Drag your file into the tool or use the upload button. If it processes locally in the browser, the file never leaves your machine, which matters for unreleased audiobooks, confidential interviews, and client work under NDA. Check the duration and waveform before proceeding.
Step 2: Let the Tool Analyze and Process
Start the analysis. The engine scans the frequency spectrum, identifies the noise profile, and applies de-noising, de-rooming, and leveling in sequence. Processing time depends on file length and CPU: a voice memo finishes in seconds, a full podcast episode takes longer.
Step 3: Download and Export Your Clean Audio
Preview the result, then export. Check three things: sibilance hasn't become harsh, the noise floor is genuinely lower, and the voice still sounds like the person who recorded it. Over-processed audio has an underwater quality that's easy to spot once you know what to listen for.
| Step | Action | What to Check | Typical Time |
|---|---|---|---|
| 1 | Upload file | Duration and waveform load correctly | Under 1 minute |
| 2 | Analyze and process | Noise profile detected, no clipping | Seconds to minutes |
| 3 | Preview and export | Voice natural, noise floor lowered | 1-2 minutes |
How to Improve Voice Recording Quality Before You Start
Better source audio beats better processing every time: a few minutes of setup before recording saves an hour of repair.
Start with the microphone. A dynamic mic on a boom arm, a hand's width from your mouth and slightly off-axis, rejects room noise far better than a laptop's built-in mic. On a phone, get close and avoid holding the device while you talk.
Then treat the room. Soft furnishings, a rug, bookshelves, and curtains absorb reflections, and recording in a closet sounds better than a kitchen for free. Turn off air conditioning, fans, and anything with a motor during takes.
Finally, set your levels. Aim for peaks that leave headroom rather than pushing the input as hot as it will go. A clean, quiet signal at moderate level processes far better than a loud, distorted one. For more on best practices, the Acoustical Society of America resources on room acoustics explain how reflections shape recorded sound.
AI Audio Enhancer Online: What It Can and Can't Fix
An AI audio enhancer online is a browser-based tool that applies machine learning to improve speech recordings through de-noising, leveling, and tonal correction. It is genuinely good at some problems and bad at others, and the most useful thing to learn is how it fails.
What It Handles Well
- Steady noise: hum, hiss, fan noise, and air conditioning
- Level inconsistency between speakers or takes
- Room reflections that blur speech intelligibility
- Plosives, sibilance, and uneven dynamic range
- Long pauses that slow the pace of delivery
What It Cannot Fix
- Clipping, where the waveform is already flattened at the peaks
- Distortion from a cheap microphone pushed too hard
- Multiple voices talking over each other
- Missing frequencies, which no processing can reconstruct
- Content problems: a garbled sentence stays garbled
Enhancement is restoration, not creation: it recovers intelligibility that noise has masked, but cannot invent detail that was never captured.
Why Processed Audio Sounds Robotic or Underwater
This failure mode will get your episode flagged in the comments. Aggressive AI de-noising removes frequency bands it has decided are not voice; when the model is too confident, it deletes the upper harmonics that carry consonant definition and the low-level breath that makes speech sound human. What remains is a voice with no air around it, robotic, metallic, or underwater.
Speech is a dense stack of harmonics, formants, and transient bursts. Plosives and sibilants are broadband events that look statistically similar to noise, so a model separating voice from noise must judge every frame, and with a complex noise profile it errs toward removal. The result measures cleaner but sounds less like a person.
A second artifact is pumping, or warbling. At high noise reduction strength, the model's estimate of the noise floor fluctuates between frames and the gain rises and falls with it, so you hear the room appear and disappear behind the voice, more distracting than the original hiss.
How to Avoid the Artifacts
- Process in stages, not in one pass. Apply moderate reduction, listen, then decide whether a second light pass is warranted. Two gentle passes usually beat one aggressive pass.
- Keep a copy of the original. Compare against the untreated file, not your memory of it; ear fatigue sets in within minutes.
- Listen on more than one system. Laptop speakers hide the underwater quality that earbuds and phone speakers expose.
- Watch the sibilance. If "s" and "sh" turn into a lisp or whistle, back the strength down.
- Leave a little noise. A completely silent background sounds unnatural and makes edits audible; a faint, even noise floor is more pleasant.
How to Remove Background Noise from Video Online
The same workflow applies to video, except you're processing the audio track inside a video container. Tools that accept MP4 and similar formats extract the audio, clean it, and return either a clean audio file or a re-rendered video with upgraded sound.
A vlog shot outdoors, a street interview, or an office product demo all carry ambient noise a viewer tolerates for about ten seconds. Cleaning the audio track lifts perceived production value more than any color grade.
The Codec Problem Nobody Mentions
Video containers compress audio lossily. AAC, the most common codec inside MP4 and MOV files, discards frequency information it predicts you won't notice, fine for playback, bad for restoration. A de-noising model needs detail to distinguish voice from noise, and a heavily compressed track has already thrown some away, so the ceiling on recovery is lower than with a clean WAV.
The practical consequence: processing a video file directly gives a good result, not a perfect one. If you control the recording, capture audio separately at a higher bitrate and sample rate, then sync it back in your editor, a 48 kHz, 24-bit WAV gives the model far more to work with than the 128 kbps AAC track embedded in the video.
Two Workflows, Two Trade-offs
Process the video directly. Fastest path: one upload, one download, no sync step. Best for social clips, quick turnarounds, and footage where the audio was never going to be studio-grade anyway. The limitation is working with whatever the codec left behind.
Extract, clean, and re-sync. More steps, better result: pull the audio out as a WAV, run it through the enhancer, then drop the cleaned track back onto the timeline and align it to the original. Standard for interviews, documentaries, and any project where dialogue clarity is the point. The cost is time and the risk of a sync error.
Sync and Frame Alignment
If you go the extract-and-replace route, keep the original audio on a muted reference track and align the cleaned track by matching a sharp transient, such as a hand clap or a hard consonant at the start of a take. Don't trust waveform eyeballing on long files; drift accumulates. Most editors let you nudge by single frames.
One more caveat: variable frame rate footage, common on phone cameras, may already be slightly out of alignment before you touch anything. Fix that first, then clean the audio, or you'll chase a sync problem unrelated to your processing.
What to Check Before You Export
- Dialogue is intelligible on phone speakers, not just studio monitors
- No metallic or underwater artifacts on sustained vowels
- Room tone is even, with no pumping behind the voice
- Sync holds from first frame to last
- The re-rendered video hasn't been downscaled or re-compressed unnecessarily
The Federal Trade Commission's guidance on endorsements and disclosures is worth reviewing if your video content includes sponsored segments, since audio quality affects nothing about your disclosure obligations.
Tips for Better Voice Recording Quality
These habits separate recordings that need heavy repair from recordings that need a light pass.
- Record a few seconds of room tone before every session, giving you and the software a clean noise profile.
- Use a pop filter and speak across the microphone rather than into it.
- Monitor with headphones while recording to catch refrigerator hum before it becomes a problem.
- Keep a consistent distance from the mic; moving closer and further changes level and tone.
- Record in one session where possible; consistent room conditions make batch processing more reliable.
- Name files consistently so batch processing and version tracking don't become a filing exercise.
The batch processing angle is the one most guides skip. If you produce weekly episodes or a course with dozens of modules, processing files one at a time is a bottleneck; tools that accept multiple files and apply the same settings turn a two-hour chore into a ten-minute one.
For creators working on sensitive material, privacy deserves a mention. Cloud-based tools upload your files to a server. Local, in-browser processing keeps unreleased audiobooks, confidential interviews, and raw client takes on your own machine. For more on data handling expectations, the National Institute of Standards and Technology cybersecurity framework outlines how organizations approach sensitive data.
Voice recordings rarely arrive clean, and the gap between raw and broadcast-ready is where most creators lose their audience. Finalizer was built for exactly that gap: drag your audio or video file into the browser and it handles de-noising, de-rooming, de-essing, peak limiting, and leveling in one pass, with a Silence Shortener that trims dead air without flattening natural speech. Because processing runs locally through WebAssembly, sensitive files never leave your device, and there's a free tier with no account required. Get started with Finalizer and turn your raw takes into broadcast-ready audio in minutes.
Frequently Asked Questions
How can I remove background noise from audio for free?
You can remove background noise from audio for free using online tools that offer a no-cost tier. For example, Finalizer provides a free option with no account registration required. Simply upload your file, let the AI process it, and download the cleaned audio. This works well for short recordings and basic noise reduction.
Is there an AI tool to remove background noise from voice recordings?
Yes, AI-powered tools like Finalizer can automatically remove background noise from voice recordings. They analyze the audio, identify noise patterns, and suppress them while preserving speech. This is faster and easier than manual editing in a DAW, making it ideal for podcasters and content creators.
Does removing background noise affect voice quality?
When done with a quality tool, removing background noise should not harm voice quality. AI algorithms are designed to distinguish speech from noise, so they reduce unwanted sounds without making the voice sound robotic. However, overly aggressive processing can introduce artifacts, so it's best to use a tool with smart detection.
Can I remove wind noise from a voice recording online?
Yes, online tools can reduce wind noise from voice recordings. AI noise reduction is trained to recognize wind noise and other environmental sounds, and it can suppress them effectively. For best results, try to record in a sheltered area and use a windscreen, but post-processing can still improve the audio significantly.